
Operators
User Management
The "Users" tab in the cairo.BI system allows for full management of users with access to the system – from adding new accounts to assigning roles, access levels, and permissions. It serves as a central administrative hub, allowing you to control who can access specific reporting data and to what extent.
Users List
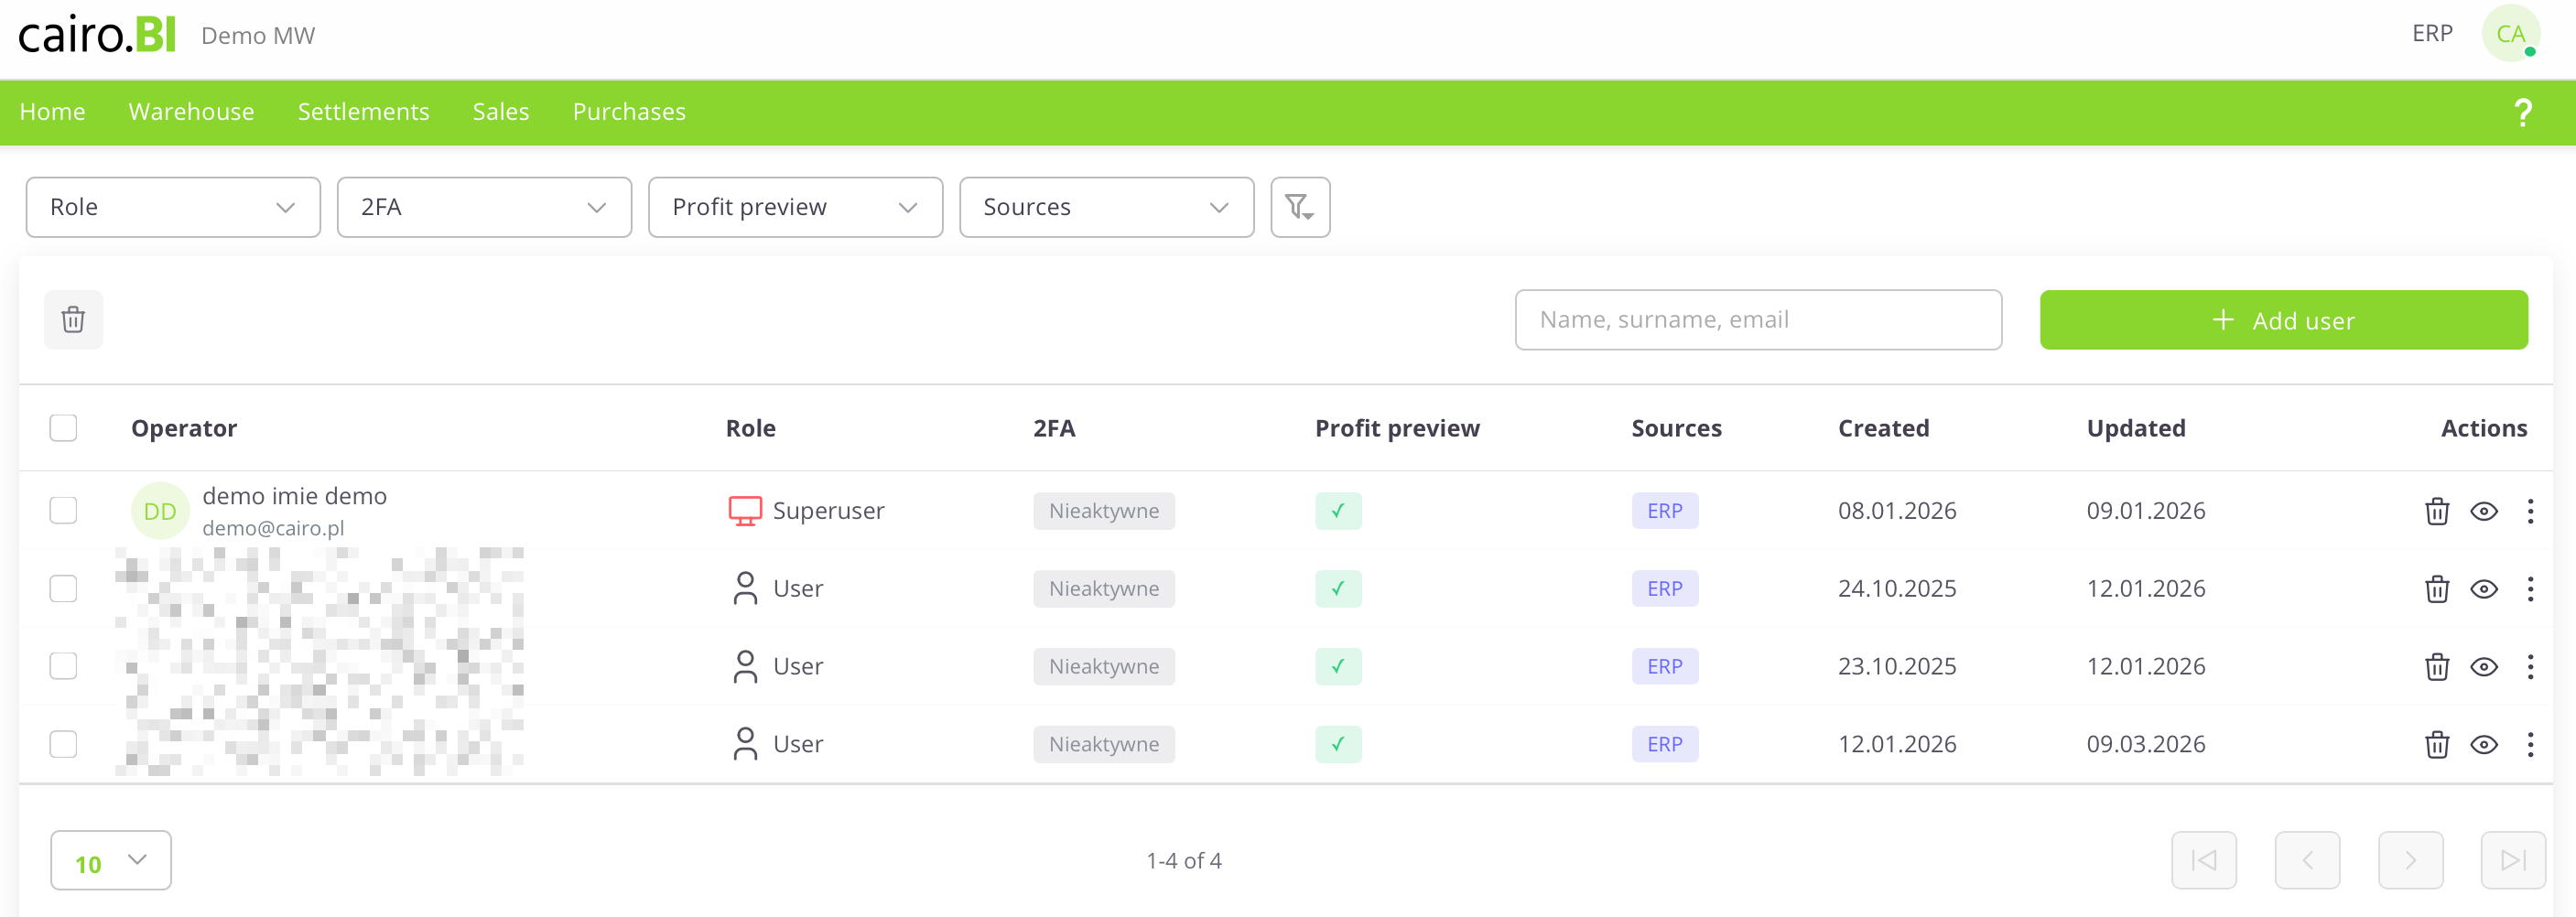
The "User Management" view presents a list of system users along with their permissions and security status. The following information is provided for each user:
-
User – The name, surname, and email address assigned to the account.
-
Role – The level of permissions in the system (e.g., Superuser, User).
-
2FA – The status of two-factor authentication (Active or Inactive).
-
Profit Preview – An indicator (checkmark) showing if the user is authorized to view margins and financial data.
-
Sources – The systems from which the data originates (e.g., ERP).
-
Created – The date the account was registered in the system.
-
Updated – The date of the last modification to the user's data.
-
Actions – A set of tools for managing a specific record: delete (trash icon), preview (eye icon), and edit.
User Card
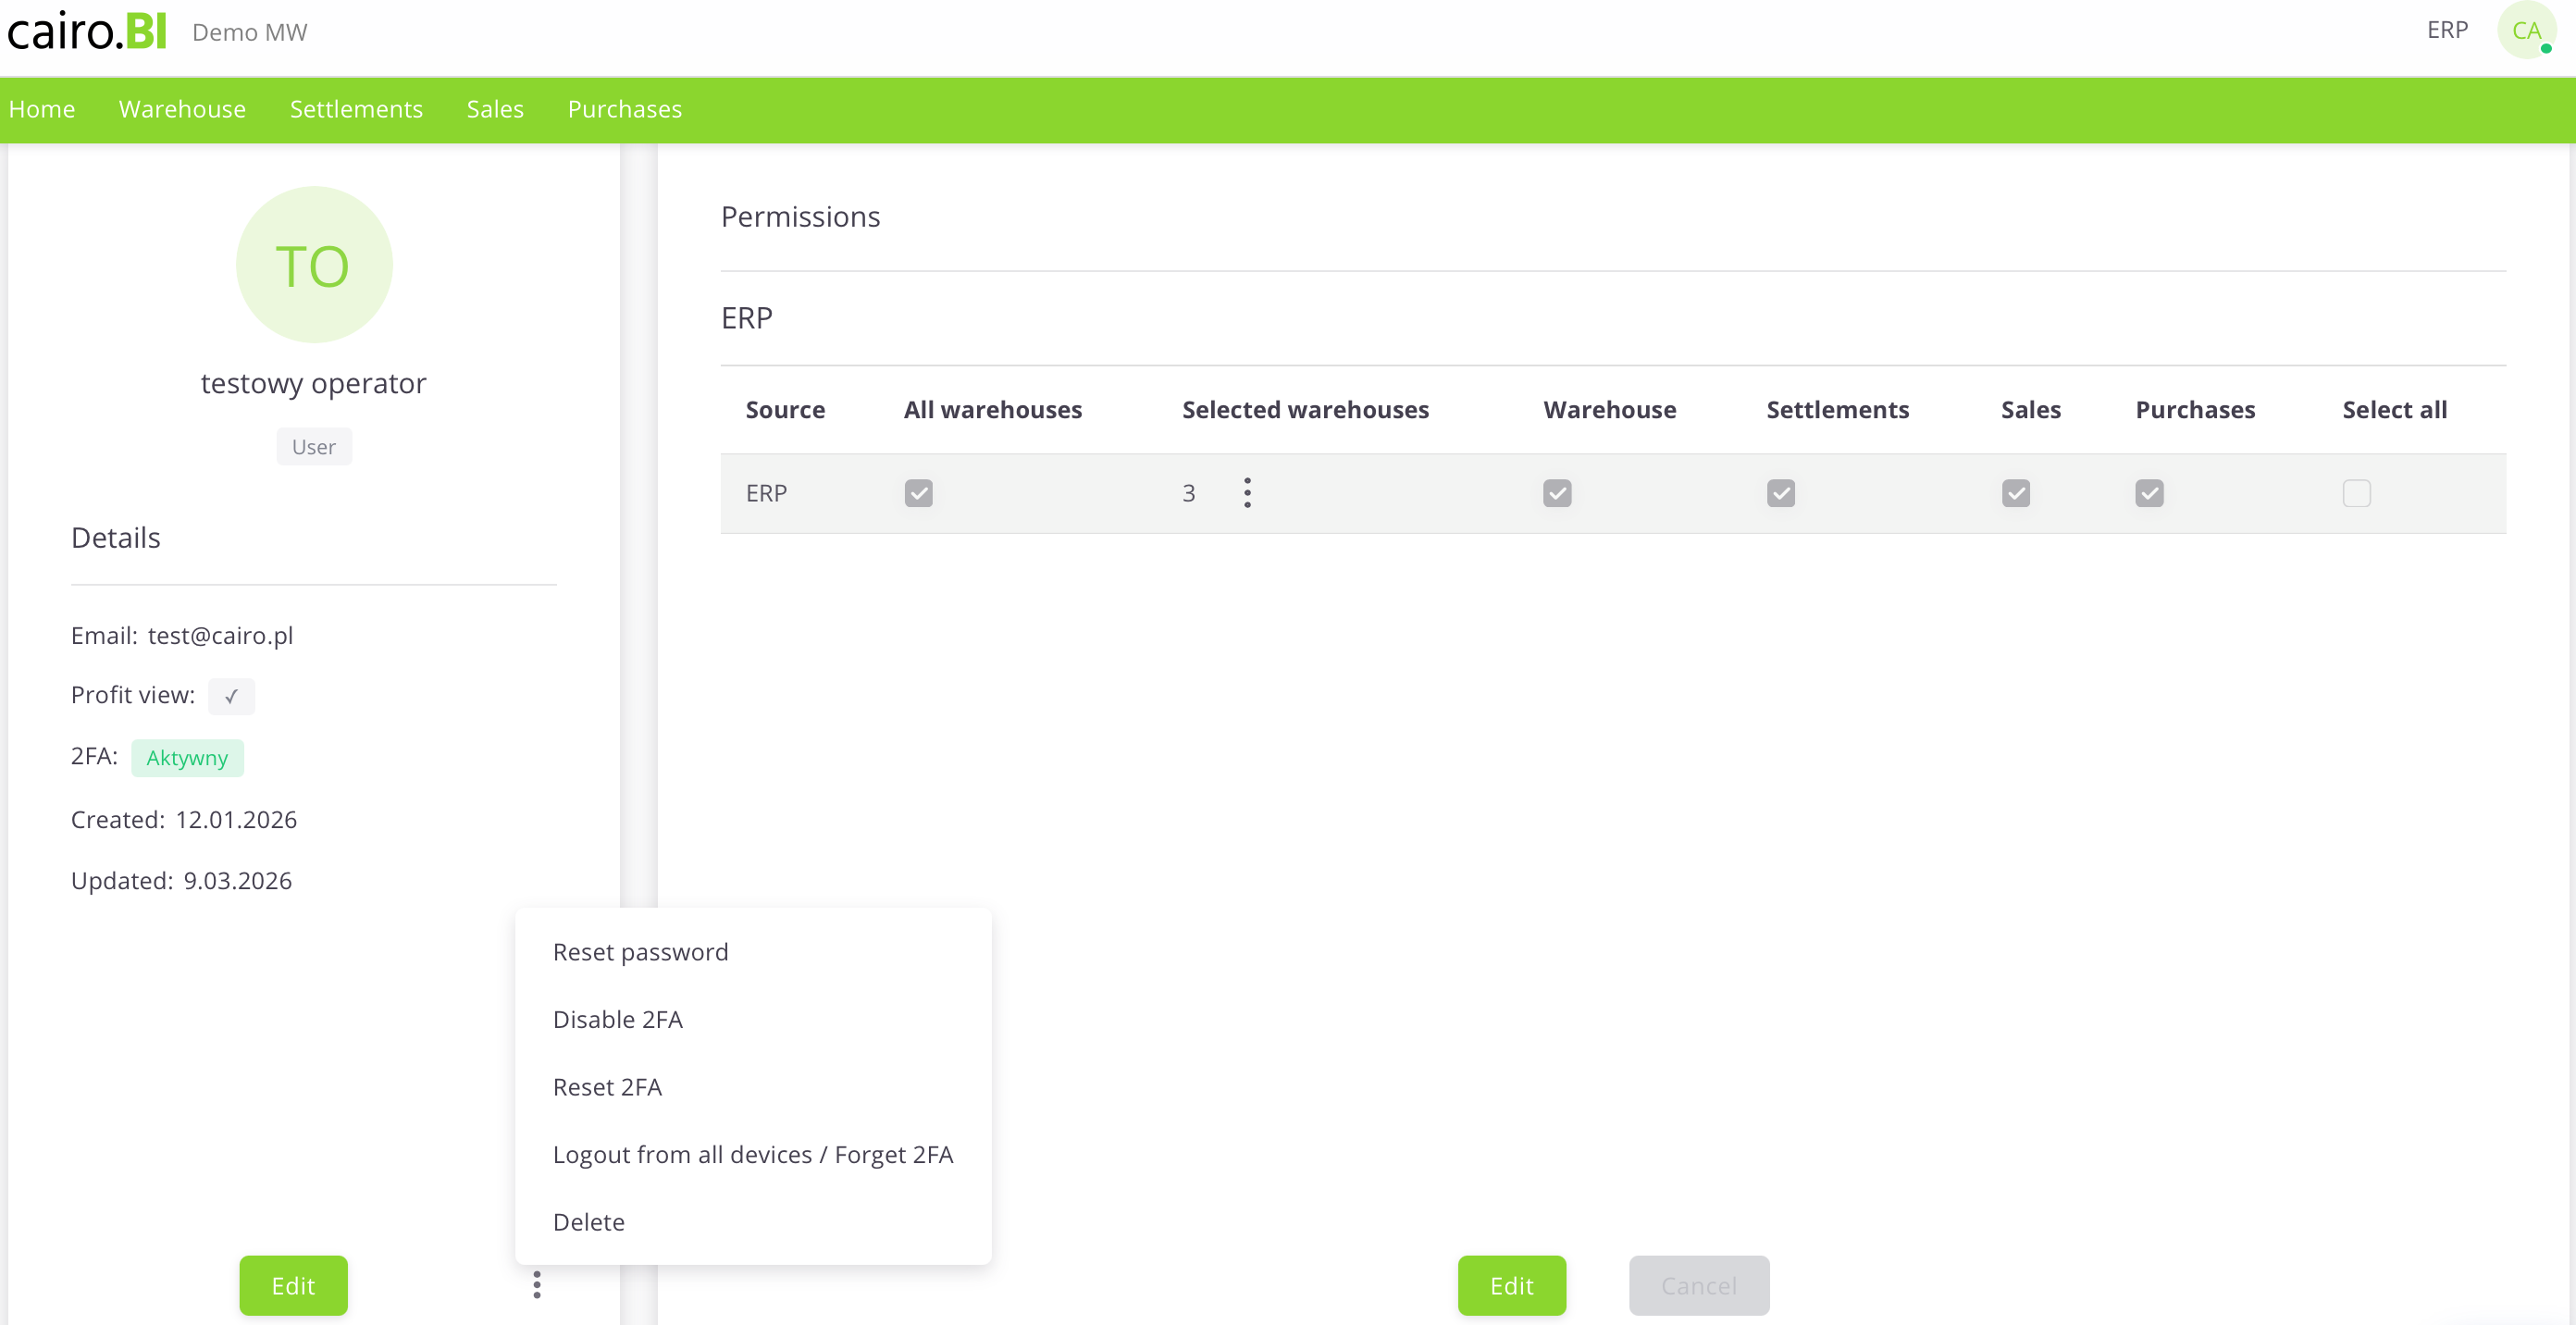
User Card (Details & Permissions)
The "User Card" is a detailed view that allows for full profile editing, account security management, and precise definition of data visibility. The card is divided into an information section and a permissions panel:
Profile Details
Located on the left side of the screen, this section displays basic user information:
-
Initials and Name – A graphical visualization along with the user's full name and assigned role.
-
Email – The address used for logging in and system communication.
-
Profit Preview – A toggle/indicator for margin visibility.
-
2FA – Current two-factor authentication status.
-
Created / Updated – Registration and last activity dates.
Permission Management
The main table allows you to assign access to specific modules and warehouses:
-
Source – The data source system (e.g., ERP).
-
All Warehouses – A collective checkbox granting access to the entire warehouse structure.
-
Selected Warehouses – A function allowing for the selective choice of specific warehouses (e.g., 03, CE, 02) via a dropdown list.
-
Tab Access (Warehouse, Settlements, Sales, Purchases) – Specific checkboxes that determine if a user has access to the corresponding sections (tabs) in the main system menu.
-
Select All – A button to quickly select all available permissions for a given source.
Additional Actions Menu
Available under the "three dots" icon, these buttons allow for advanced account administration:
-
Reset Password – Forces the user to change their password.
-
Disable / Reset 2FA – Manages the additional layer of account security.
-
Logout from all devices / Forget 2FA – Immediately terminates all active sessions and trusted device settings for the user.
-
Delete – Completely removes the user card from the system.
Adding a new user
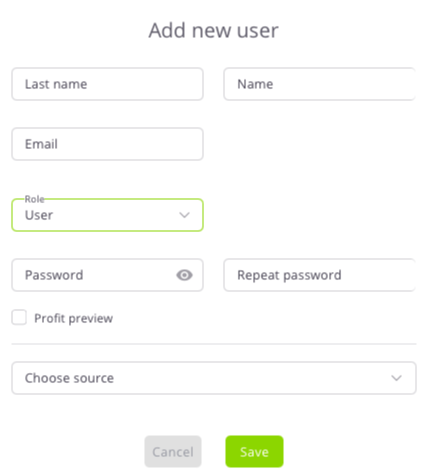
The "Add New User" configuration window allows you to enter identification data and define the user's initial role and access levels. The following fields are completed in the form:
-
Surname and Name – Text fields for user identification.
-
Email – The address used as the login for the platform.
-
Role – A dropdown list to choose the access level: Superuser or User.
-
Password / Repeat Password – Fields to define the access key with an option to preview characters.
-
Profit Preview – A checkbox determining the right to view financial data.
-
Select Source – A dropdown list to indicate the data source system (e.g., ERP).
Data is confirmed with the "Save" button, or discarded using "Cancel".
Superuser
A user with Superuser permissions has full access to all data and system functions. This role can:
-
Add, delete, and edit users.
-
Assign roles, sources, and warehouses.
-
Grant or revoke permissions.
-
Manage system configuration.
It is recommended to grant Superuser status only to trusted system administrators.
Two-Factor Authentication (2FA)
Two-factor authentication (2FA) provides an extra layer of security, requiring not just a password but also a unique code generated in a mobile app during login.
1. Monitoring 2FA Status
Security status can be checked in two views:
-
User Table: The "2FA" column shows if the function is Active (white/gray) or Inactive (light gray).
-
User Card: The "Details" section (left panel) displays the current status (e.g., 2FA: Active).
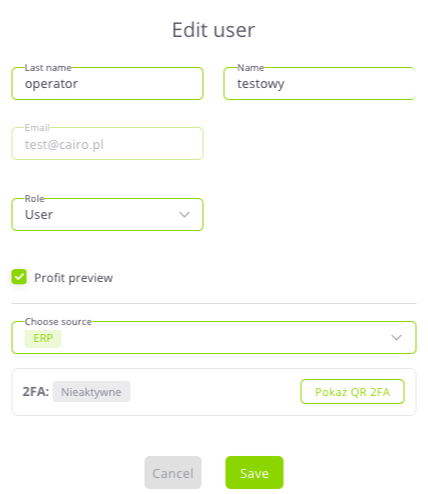
2. Activation and Configuration
Activation is performed through the profile edit mode:
-
The 2FA section is located in the "Edit User" window.
-
If the status is Inactive, click the "Show 2FA QR" button to display a code to be scanned in an authenticator app (e.g., Google Authenticator).
